How to make a 360° virtual tour
To make a 360° virtual tour, you create a 360° image at every stop in the space. You either shoot it with a 360° camera or, if the project isn’t built yet, export a 360° render from your 3D software. Then you upload these images to virtual tour software, link the rooms to each other with hotspots, and share the tour with a single link. Whether the images come from a camera or a render, the steps after the upload are the same.
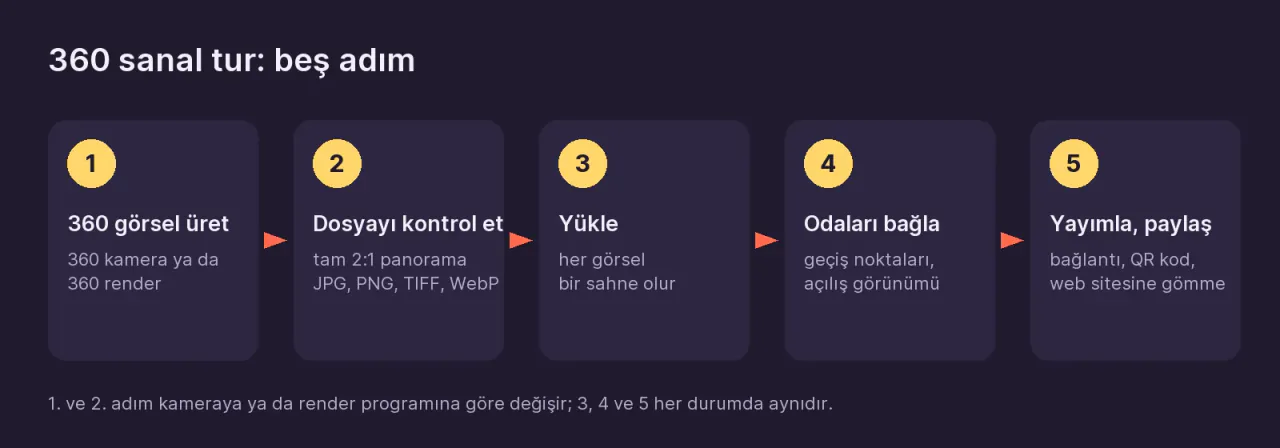
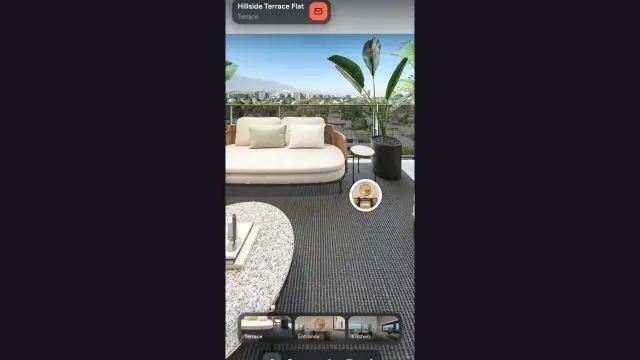
Tour note: Drag to look around, and click the rings on the floor to move between rooms.
What do you need for a 360-degree virtual tour?
There are two paths, depending on whether the space actually exists:
| Question | The space exists (home, office, hotel) | The space doesn’t exist yet (project, renovation) |
|---|---|---|
| How do you create the image? | By shooting it with a 360° camera | By rendering a 360° image in 3D software |
| Equipment you need | A 360° camera, a slim stand (a monopod or a light stand), and the camera’s phone app | A 3D model of the scene and rendering software (3ds Max, SketchUp, Blender, Lumion, D5, and the like) |
| Output file | 2:1 panorama JPG | 2:1 panorama JPG, PNG, or TIFF |
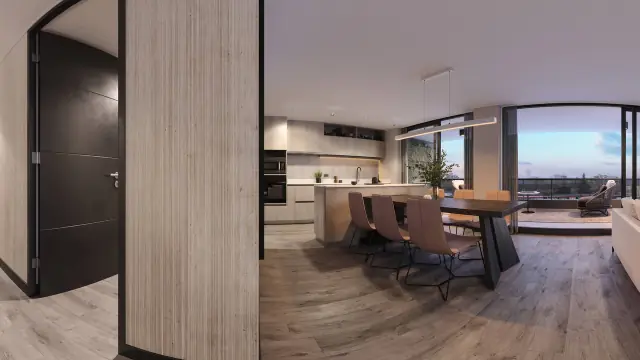
Both paths leave you with the same kind of file: a 360° image whose width is exactly twice its height. Virtual tour software wraps this file onto a sphere, and the visitor can look in every direction from that point.
Step 1: Plan your camera points and create the 360° images
Choose the points first
Each 360° image becomes a scene in the tour. The visitor moves from one scene to the next. So before you start shooting or rendering, choose where the camera will stand:
- At least one point per room. In small rooms (bathroom, pantry), the doorway is usually enough.
- Extra points in hallways and in doorways that join two rooms. These in-between points are what make the transitions feel natural.
- Set the order up front: entrance, living room, kitchen, hallway, bedrooms, bathroom, balcony. This becomes the scene order in the tour.
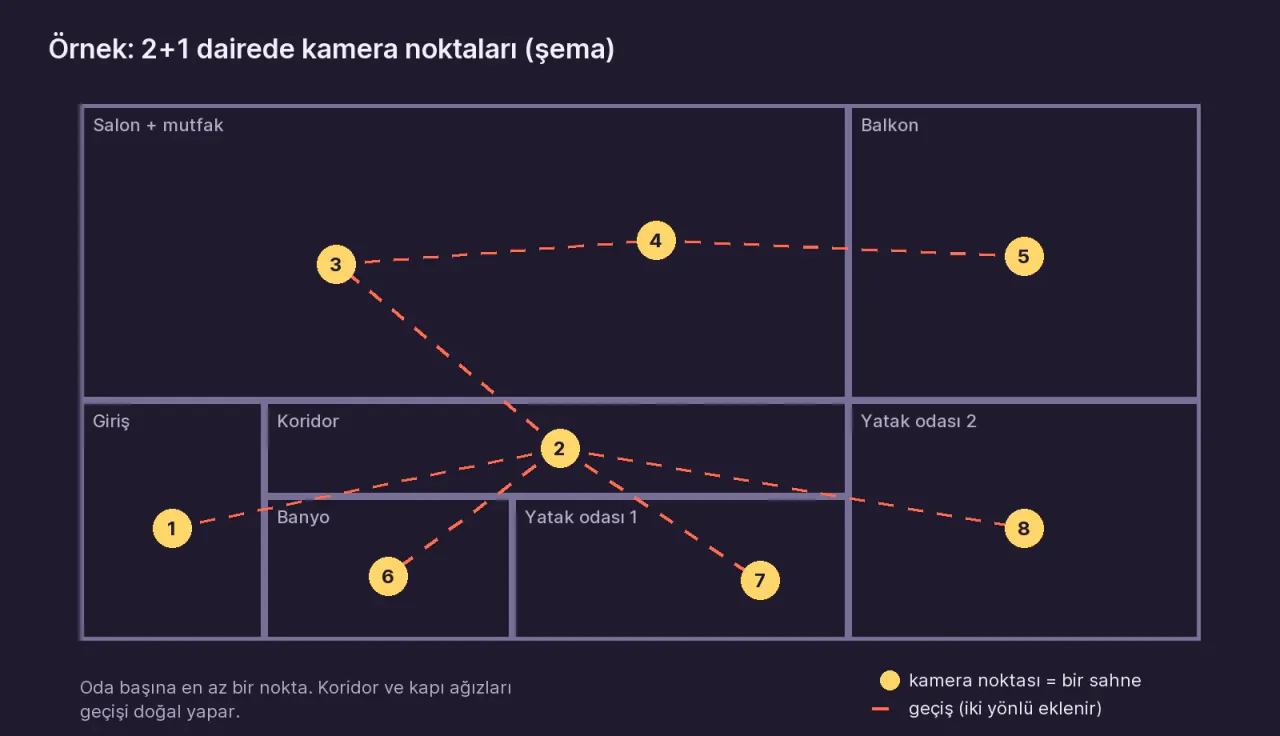
Eight to ten scenes are enough for a typical two-bedroom apartment. You’ll find how many photos each room type needs in How many 360° photos does a home need?
If you’re shooting with a camera
- Turn on all the lights, open the interior doors and curtains, and clear away the clutter.
- Set the camera on the point, about 1.5 m off the floor.
- Keep the camera level. Check the bubble level in the app. A tilted shot looks tilted in the tour too; Prewalk doesn’t straighten a tilted horizon, and the only fix is extra work in panorama editing software.
- Turn on HDR mode if your camera has it. In rooms with windows, it balances the view outside and the interior in the same shot.
- Start the timer or the remote shutter from the app, and step out of the frame.
- Check the shot on your phone: can you see your reflection in a mirror or a window, or the stand’s shadow on the floor?
For a detailed shot list and the doorway shot: How to shoot a home with a 360° camera
If you’re rendering
- Place a camera in the scene for each camera point. For eye level, 1.5–1.6 m above the finished floor is a good starting height.
- Keep the camera perfectly level. A camera tilted up or down gives you a tilted horizon.
- Set the camera type to spherical (also called equirectangular or panoramic).
- Set the output size to 2:1, for example 8192 × 4096.
- Save as JPG, PNG, or TIFF. Convert EXR or HDR output first.
For the settings in each program: Export a 360° render from your render software. If you use 3ds Max and Corona, there’s a step-by-step guide: 360° render and virtual tour with 3ds Max + Corona.
Step 2: Check the file (the 2:1 rule)
The one hard requirement for a 360° image to become a tour is that it’s a 2:1 panorama covering the full sphere. The width must be exactly twice the height.
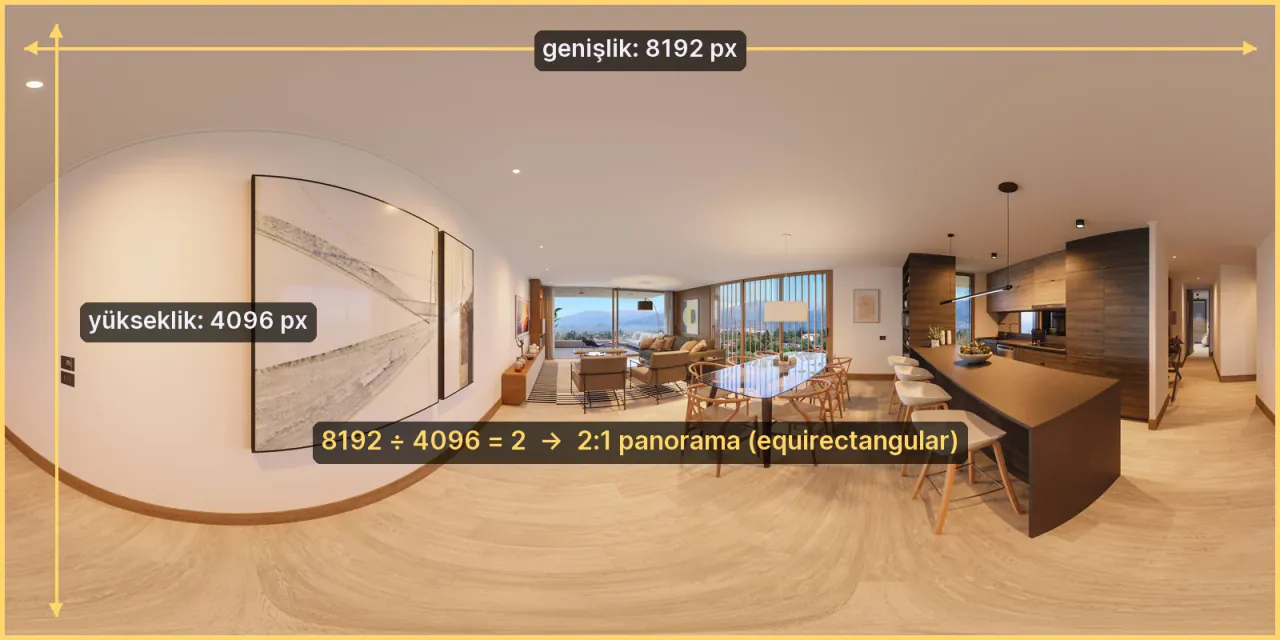
To check, right-click the file and look at its dimensions (Windows: Properties → Details; Mac: Get Info). Divide the width by the height: the result should be 2.
| Check | Right | Wrong |
|---|---|---|
| Ratio | 8192 × 4096, 5760 × 2880 | 8192 × 3800 (cropped), a phone’s panorama strip |
| Content | Full sphere: ceiling and floor included | A regular photo cropped to 2:1 |
| File type | JPG, PNG, TIFF, WebP | EXR, HDR, HEIC, RAW, video |
| Size | Up to 1 GB per file | Uncompressed 16-bit 16K TIFF |
Prewalk is a platform that turns 360° photos and renders into virtual tours that open in the browser on phones, computers, and Meta Quest. On Prewalk, the Free plan accepts files up to 8192 px wide (8K), and Pro and above up to 16384 px wide (16K). If a file is rejected, Common 360° export mistakes shows the reason and the fix, one case at a time.
Step 3: Upload the images
The steps below are for Prewalk Studio. Other virtual tour software uses different menu names, but the logic is the same.
- Before you upload, name the files after the rooms:
01-entrance.jpg,02-living-room.jpg. The file name becomes the scene name, and the numbers keep the order. - At prewalk.co/studio, create a project with + New project. If you’re sharing a single tour, Quick tour works too.
- Click + New tour and name the tour after the space: “Sample apartment · 2 bedrooms”.
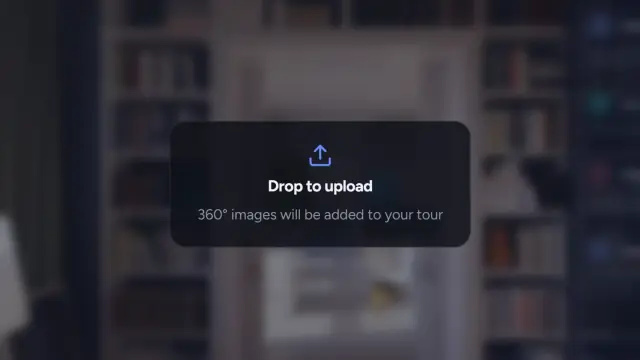
- Drag all the files onto the editor at once.
Scenes open as they become ready. The “Sharpening” label shows that the full resolution is still being prepared. You can move on to the next step while you wait.
Step 4: Link the rooms
What takes the visitor from one room to the next is a hotspot. Think of it as a ring on the floor.
- In the scene strip at the bottom, open the scene where the transition starts.
- From the strip, drag the scene of the room you want to go to onto the 360° view, and drop it on the floor near the doorway.
- Hotspots are one-way. Open the other room and drop another hotspot for the way back. Every door needs two.
- In each scene, turn the view to its best angle and click Save current view. This is the scene’s opening view.
- The first scene in the strip is where the tour starts. Drag the entrance or the most impressive room to the front.
The start scene’s opening view is the preview image that appears when the link is shared on WhatsApp or LinkedIn. For hotspot shapes and transition types: Linking rooms: hotspots, opening view and the start scene
Step 5: Publish and share
- First, use Preview to walk through the tour as a visitor will see it. Check that you can get back from every room.
- Click Publish and choose who can see the tour:
- Link only: anyone with the link can open it, and it isn’t listed anywhere. This is the default for new tours.
- Public: it appears on your profile and in Explore.
- Password: it needs the link and a password (on paid plans).
- On the Share tab, choose how you want to share it:
- copy the tour link,
- download a QR code for a sign or a business card,
- get an embed code for your website.
On the Free plan, shared tours show a small Prewalk badge. On Pro and above, the badge goes away and your own logo takes its place. For ways to share, see Share a tour; for embedding, see Embed a tour on your website.
How long does it take to make a 360° virtual tour?
- Shooting: About twenty minutes on site for an apartment with 8–10 scenes.
- Rendering: The time depends on the scene’s complexity, the resolution, and your computer. A 360° render takes longer than a regular frame of the same scene, because the software calculates the light for the whole sphere, not just for one view.
- Uploading and linking: A few minutes if the files are ready. For your first tour in Prewalk, click by click: Your first tour in 10 minutes
Common mistakes in a 360° virtual tour
- Using your phone’s panorama mode. This mode shoots a strip with no ceiling or floor; it isn’t a 360° image.
- Exporting a “flat,” cropped, or “tiny planet” image from the app. Only a full 2:1 panorama works.
- Setting the camera at a tilt. The horizon stays tilted both in the tour and in a VR headset.
- Forgetting the return hotspot. The visitor gets stuck in a room.
- Publishing without saving the opening views. The visitor starts out facing a wall, and the share preview faces the wrong way too.
Frequently asked questions
Can you make a 360° virtual tour with a phone? Your phone’s regular panorama mode won’t work, because it doesn’t capture the ceiling and floor. You can do it with a 360° app that captures the full sphere, but stitching seams and soft details are common. For work that goes to a client, you need a 360° camera. Details: Can I make a 360° tour with my phone?
Can you make a 360° virtual tour for free? Yes. On Prewalk’s Free plan, you can publish up to 30 scenes at up to 8K resolution, share your tours by link, and embed them on your website. Shared tours show a small Prewalk badge.
Does a virtual tour open in a VR headset? Prewalk tours open in the Meta Quest browser without installing an app. Regular (mono) 360° images look flat in the headset. For real depth, you need a top-bottom stereo render; it’s supported on Pro and above.
How many 360° images do you need? At least one per room. For a two-bedroom apartment, eight to ten scenes are usually enough.
When is a 360° virtual tour not enough?
A 360° virtual tour shows a space from set points. The visitor jumps between these points and can’t walk everywhere in between. If you need to take measurements, a 3D dollhouse view of the whole building, or free movement between points, what you need is a 3D scanning system. 360° photos vs 3D scans: which do you need? compares the two to help you choose.
Next step
If you have 360° images, you can create your first tour right away in Prewalk Studio with a free account. For a button-by-button walkthrough: Your first tour in 10 minutes. If you don’t have images yet, start with the shooting or rendering guide.